mirror of
https://github.com/vrtmrz/obsidian-livesync.git
synced 2024-12-12 09:04:06 +02:00
109 lines
4.8 KiB
Markdown
109 lines
4.8 KiB
Markdown
# obsidian-livesync
|
|
|
|
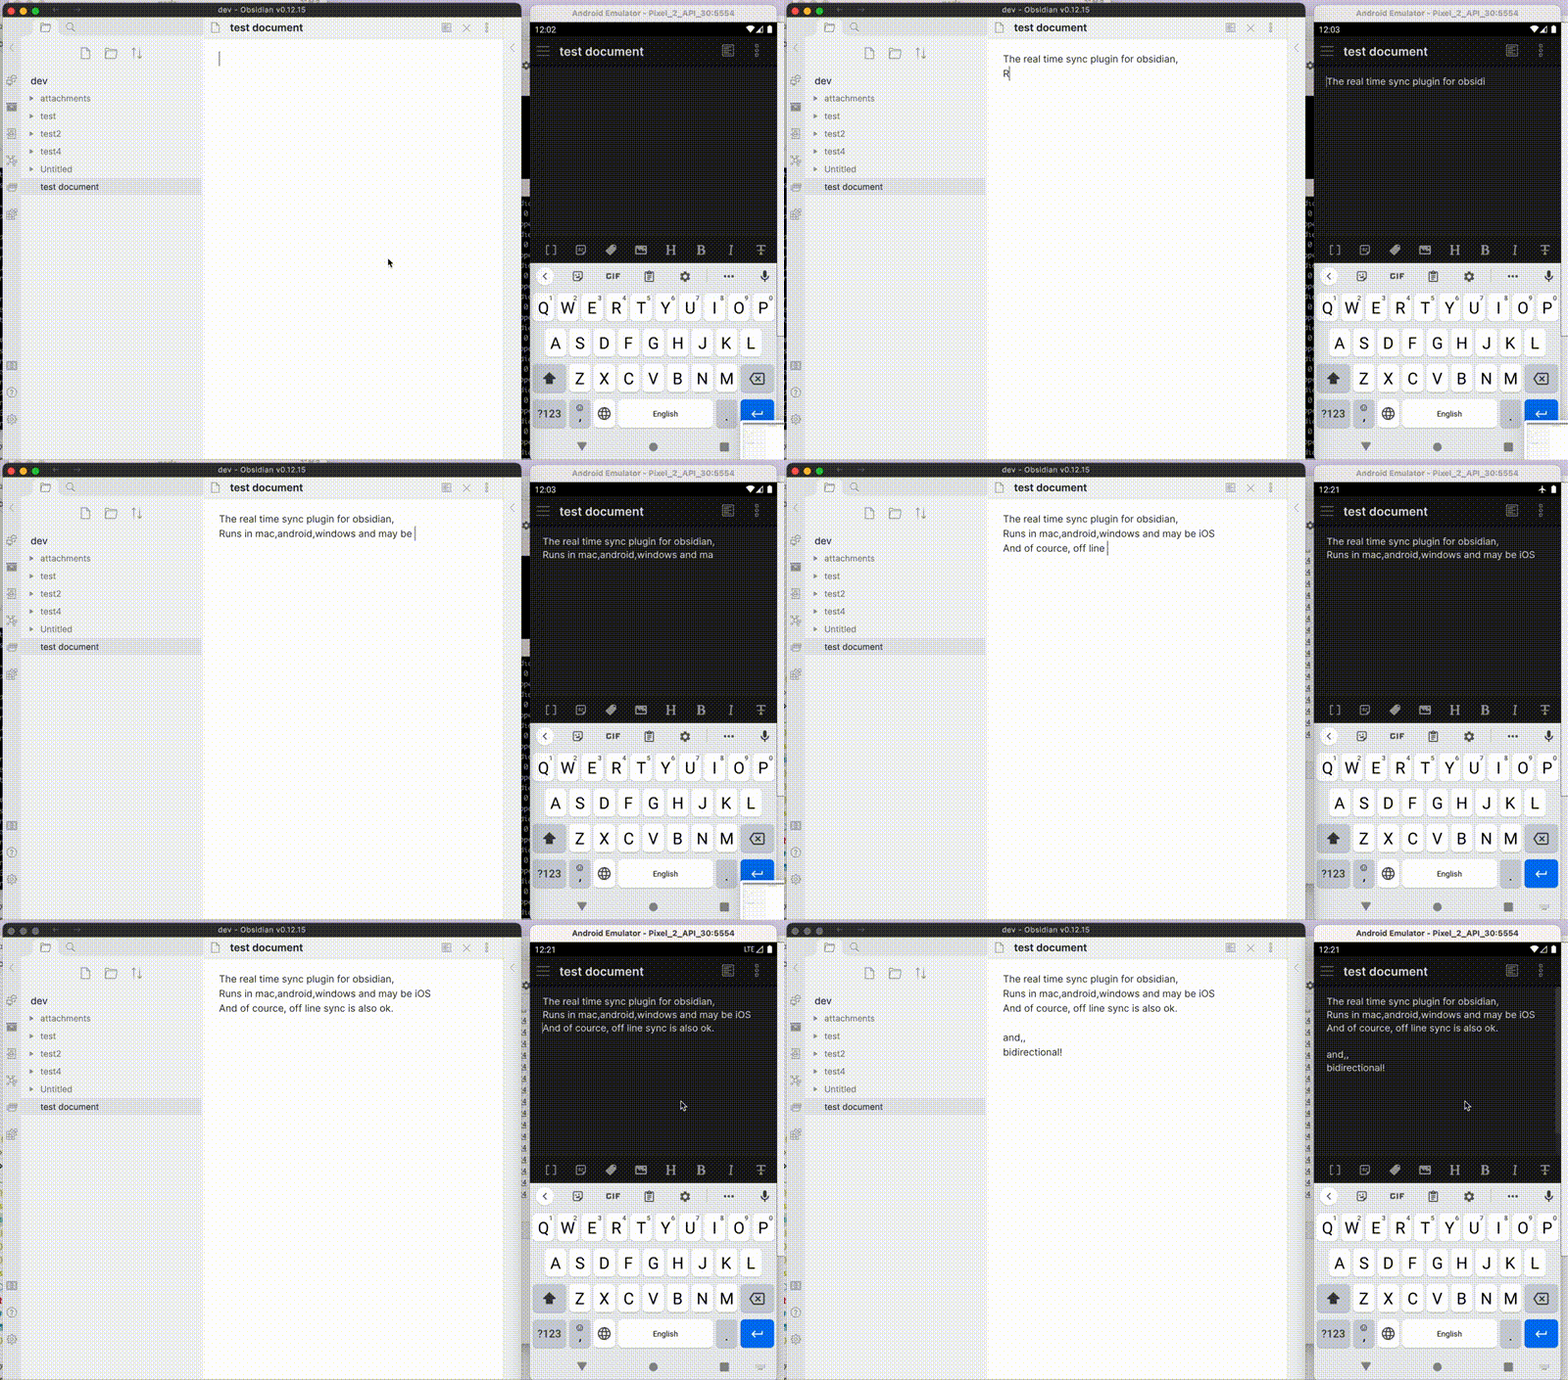
This is the obsidian plugin that enables livesync between multi terminals.
|
|
Runs in Mac, Android, Windows, and iOS.
|
|
|
|
<!-- <div><video controls src="https://user-images.githubusercontent.com/45774780/137352386-a274736d-a38b-4069-ac41-759c73e36a23.mp4" muted="false"></video></div> -->
|
|
|
|

|
|
|
|
|
|
**It's beta. Please make sure back your vault up!**
|
|
|
|
Limitations: File deletion handling is not completed.
|
|
|
|
## This plugin enables..
|
|
|
|
- Live sync
|
|
- Self-Hosted data synchronization with conflict detection and resolving in Obsidian.
|
|
|
|
## How to use the beta build
|
|
|
|
1. download this repo and expand `[your-vault]/.obsidian/plugins/` (PC, Mac and Android will work)
|
|
1. enable obsidian livesync in the settings dialog.
|
|
1. If you use your self-hosted CouchDB, set your server's info.
|
|
1. or Use [IBM Cloudant](https://www.ibm.com/cloud/cloudant), take an account and enable **Cloudant** in [Catalog](https://cloud.ibm.com/catalog#services)
|
|
Note please choose "IAM and legacy credentials" for the Authentication method
|
|
Setup details are in Couldant Setup Section.
|
|
1. Setup LiveSync or SyncOnSave or SyncOnStart as you like.
|
|
|
|
## Cloudant Setup
|
|
|
|
### Creating an Instance
|
|
|
|
1. Hit the "Create Resource" button.
|
|

|
|
|
|
1. In IBM Cloud Catalog, search "Cloudant".
|
|

|
|
|
|
1. You can choise "Lite plan" in free.
|
|

|
|
|
|
Select Multitenant(it's the default) and the region as you like.
|
|
 3. Be sure to select "IAM and Legacy credentials" for "Authentication Method".
|
|

|
|
|
|
4. Select Lite and be sure to check the capacity.
|
|

|
|
|
|
5. And hit "Create" on the right panel.
|
|

|
|
|
|
6. When all of the above steps have been done, Open "Resource list" on the left pane. you can see the Cloudant instance in the "Service and software". Click it.
|
|

|
|
|
|
7. In resource details, there's information to connect from obsidian-livesync.
|
|
Copy the "External Endpoint(preferred)" address. <sup>(\*1)</sup>
|
|

|
|
|
|
### CouchDB setup
|
|
|
|
1. Hit the "Launch Dashboard" button, Cloudant dashboard will be shown.
|
|
Yes, it's almost CouchDB's fauxton.
|
|

|
|
|
|
1. First, you have to enable the CORS option.
|
|
Hit the Account menu and open the "CORS" tab.
|
|
Initially, "Origin Domains" is set to "Restrict to specific domains"., so set to "All domains(\*)"
|
|
_NOTE: of course We want to set "app://obsidian.md" but it's not acceptable on Cloudant._
|
|

|
|
|
|
1. And open the "Databases" tab and hit the "Create Database" button.
|
|
Enter the name as you like <sup>(\*2)</sup> and Hit the "Create" button below.
|
|

|
|
|
|
1. If the database was shown with joyful messages, then you can close this browser tab now.
|
|

|
|
|
|
### Credentials Setup
|
|
|
|
1. Back into IBM Cloud, Open the "Service credentials". You'll get an empty list, hit the "New credential" button.
|
|

|
|
|
|
1. The dialog to create a credential will be shown.
|
|
type any name or leave it default, hit the "Add" button.
|
|

|
|
_NOTE: This "name" is not related to your username that uses in Obsidian-livesync._
|
|
|
|
1. Back to "Service credentials", the new credential should be created.
|
|
open details.
|
|

|
|
The username and password pair is inside this JSON.
|
|
"username" and "password" are so.
|
|
follow the figure, it's
|
|
"apikey-v2-2unu15184f7o8emr90xlqgkm2ncwhbltml6tgnjl9sd5"<sup>(\*3)</sup> and "c2c11651d75497fa3d3c486e4c8bdf27"<sup>(\*4)</sup>
|
|
|
|
### obsidian-livesync setting
|
|
|
|

|
|
example values.
|
|
|
|
| Items | Value | example |
|
|
| ------------------- | ----------- | --------------------------------------------------------------------------- |
|
|
| CouchDB Remote URI: | (\*1)/(\*2) | https://xxxxxxxxxxxxxxxxx-bluemix.cloudantnosqldb.appdomain.cloud/sync-test |
|
|
| CouchDB Username | (\*3) | apikey-v2-2unu15184f7o8emr90xlqgkm2ncwhbltml6tgnjl9sd5 |
|
|
| CouchDB Password | (\*4) | c2c11651d75497fa3d3c486e4c8bdf27 |
|
|
|
|
# License
|
|
The source code is licensed MIT. |